6. Filters
Introduction
CellexalVR features a filtering feature for the selection tool. Applying a filter to the selection tool allows you to select only cells that fit some criteria. Filters can be defined in text files using your favorite text editor, or created in a CellexalVR session. To apply a pre-defined filter, press the "Filter Menu" button on the menu. The filters will be listed in the menu that opens up. The filters' names are just the name of the files that they stemmed from. To create a pre-defined filter, check out this section.
To reset your current filter, press the "Reset filter" in the filter menu.
The filter creator board
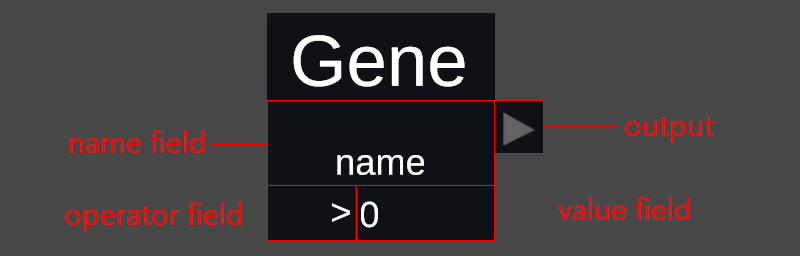
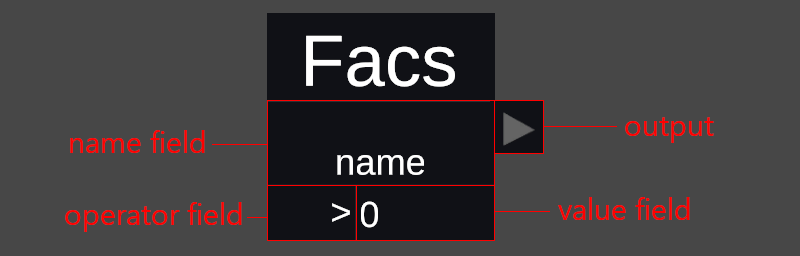
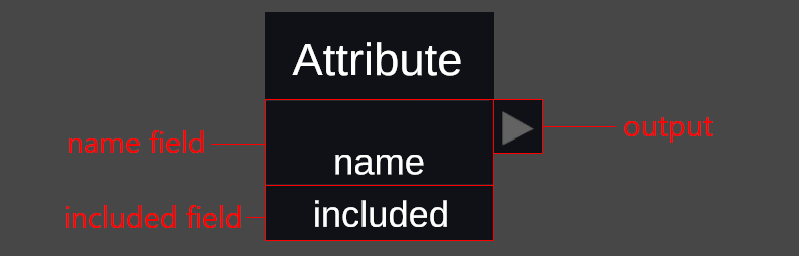
To create a filter in a VR session, press the "Filter Menu" button to open up the filter menu, and then press the "Filter Creator" button in the top right corner. A board will pop up somewhere in the environment. On the board you should see one block with the word "Result" on it. There are more blocks below the board that can be grabbed by the handle and placed on the board. Each block represents a part of the filter, the blocks that say "Gene", "Facs" and "Attribute" are used to filter cells by their respective characteristics. After placing one of the "Gene", "Facs" or "Attribute" blocks on the board you can move the action controller to the different fields of the block, press the action controller's trigger button, and use the keyboard that appears to change the value of that field. All blocks are pictured at the right with their respective fields.
The "Gene" and "Facs" blocks have three fields each: name, operator and value. Press the name field and type in the name of the gene or facs that you want to filter upon, then press the operator field and select the appropriate operator and finally click the value field to edit the value to filter upon. If you are familiar with your data, you may type in absolute values to filter upon, otherwise it might be a good idea to type in percent values (don't forget the percent sign). The percentages are always based on the highest expression of that gene or facs in the entire dataset.
The attribute block works slightly differently, it has two fields: a name and an "included/not included" field. To filter upon an attribute, press the name field and type in the attribute name and then click the "included/not included" field to change its value, no keyboard here.
Note that the filter board is not synchronized when you're in a multiuser session, however cells that you select with your filter are synchronized. Other users will see the same cells being selected as per the rules of your filter, but should they wish to also use it they must recreate the same filter using their filter creator boards. This may be subject to change in future versions of CellexalVR.
Defining a simple filter
To define a simple filter that only filters upon one gene, facs or attribute, place the appropriate block on the board as described above and move the action controller to the gene, facs or attribute block's output port and press the trigger. Then move the controller to the result block's input port and press the trigger once again to connect the two blocks. If everything is correct, a green text that says "Filter loaded" should appear for a few seconds on the result block.
If you grab a block by mistake or do not want a block anymore you can place it in the trashbin in the lower right corner of the filter creator board to remove it.
Defining a complicated filter
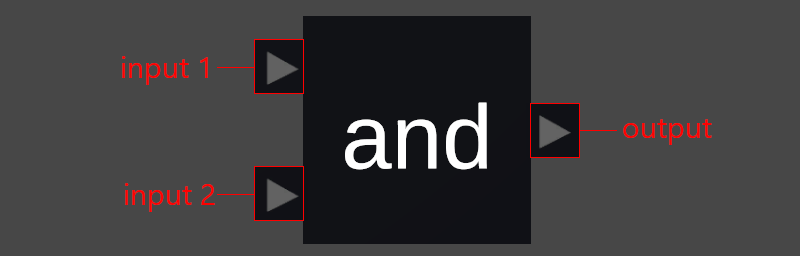
The other blocks that have both inputs and outputs can be used to combine different blocks to create more complicated filters. If you are familiar with boolean logic, these blocks' functions should be obvious to you, if not, they are described below.
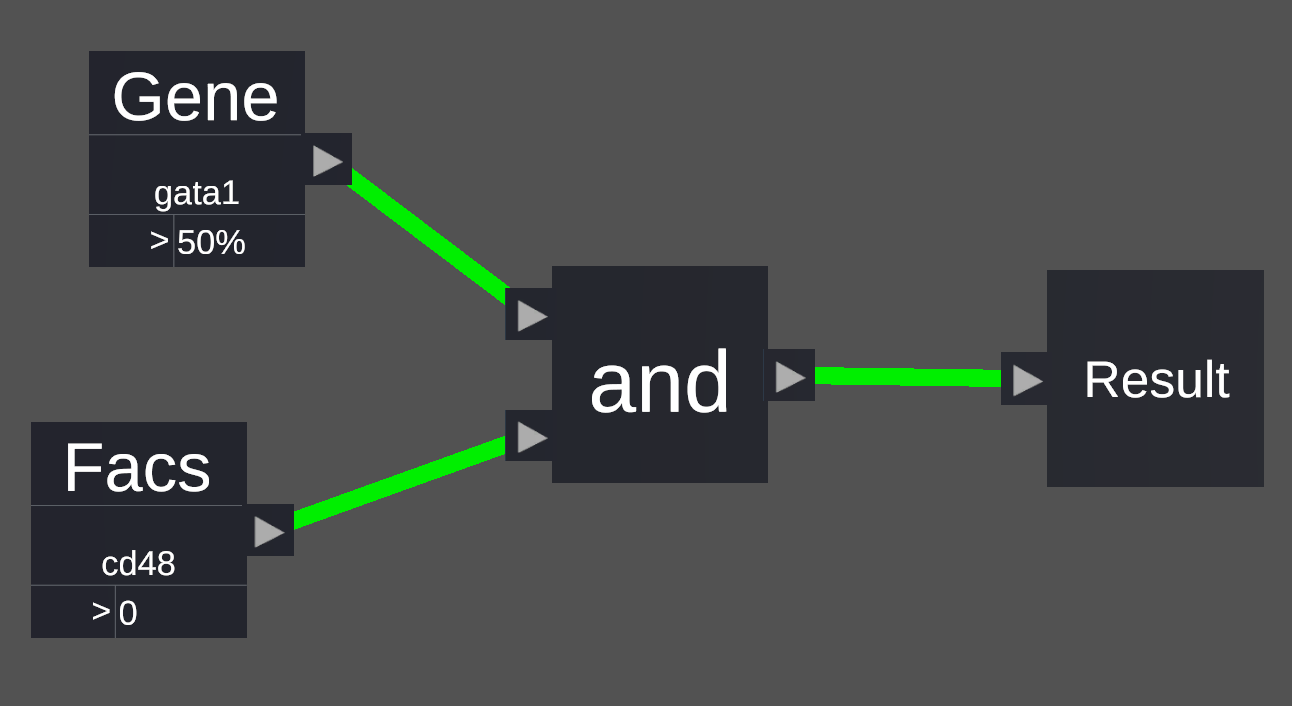
The and block will take two inputs and outputs whether both inputs are true. For example, in the picture to the right the conditions gata1 > 50% and cd48 > 0 have been combined with an and block. This means that cells must fulfill both the requirements in order to pass the filter and be selected.
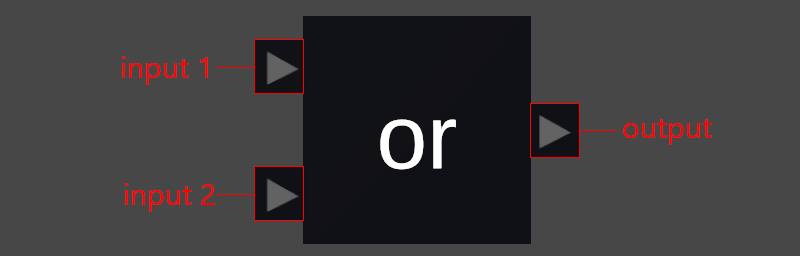
The or block will take two inputs and outputs whether one or both inputs are true.
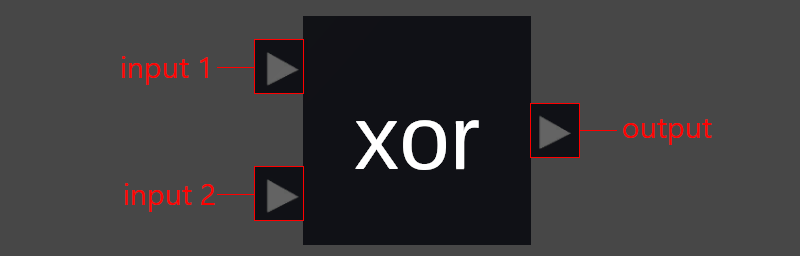
The xor block will take two inputs and outputs whether the inputs are different (one is true and the other is false). It does not mather which input is true and which is false, just that one of them is true and the other is false.
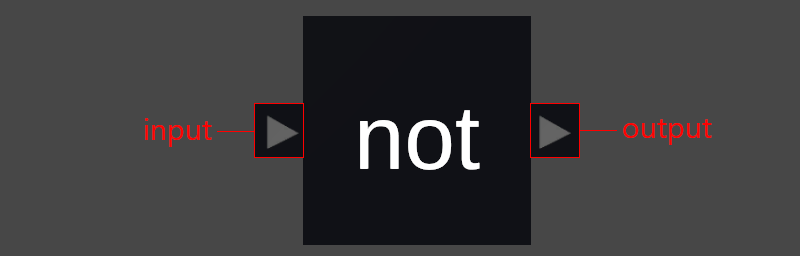
The not block will take one input and outputs the opposite of the input. If the input is true, the output is false and vice versa.
Using these blocks you can define more complicated filters based on your needs. If you find your self running out of space on the board, consider typing your filter into a text file, as mentioned above.
Saving a filter
Once you are happy with your filter you can save it for easier access in your next CellexalVR session. Simply press the "Save" button located on the filter creator board's left side. This will save your filter as a text file with the .fil extension in the Output/<username>/<dataset> folder. You can find this folder easy by opening the settings menu and clicking the "Open output folder" button. Saved filters can be edited using your favourite text editor. If you make changes to a filter file with a text editor when CellexalVR is running, you will need to save the file and reload the filter in the filter menu for the changes to take effect. These changes won't appear on the filter creator board.